If you are here, chances are that A_ You are coming from this post about safeguarding and creating good passwords the right way ,or B_ we got lucky and you found our post on google or something similar 🙂
Either way, we are here to share our knowledge and in this article we will teach you how to use KeepassXC: A great open source password manager that works on Windows, linux and MacOS Operating Systems and has lots of features. Some of them are:
- Create, open, and save databases in the KDBX format (KeePass compatible to KDBX4 and KDBX3)
- Store sensitive information in entries that are organized by groups
- Search for entries
- Password generator
- Auto-Type passwords into applications
- Browser integration with Google Chrome, Mozilla Firefox, Microsoft Edge, Chromium, Vivaldi, Brave, and Tor-Browser
- Entry icon download
- Import databases from CSV, 1Password, and KeePass1 formats
As seen in their official website
Who is this tutorial for?
We aim this tutorial at beginners so we will cover the basics which by the way are a great starting point. Knowing how to secure a and create strong passwords is the foundation for building a good personal security framework. Once you are conscious about the thin line separating your resources from the grasp of hackers then you will be more aware and maybe interested in more complex areas like using open PGP for encryption and/or privacy focused browsers and operating systems. Yes, there are entire operating systems (Like the one you use for your desktop or laptop computer) focusing on its operator’s privacy and security. We will upload more articles regarding this matter soon, so stay tuned!
In this Article we will install and use an instance of KeepassXC on a Windows Machine, so that we can show you how you can do it yourself. Their official website offers instructions for Linux and MacOS users as well. We use Windows in this case as it is the most widely used Operating System, and usually the most vulnerable.
Without further ado, lets get into action!
Step 1: Downloading KeepassXC
Download KeepassXC from its OFFICIAL SOURCE. We stress it because it is a very good practice to always download anything you want from its original source. Why? Because you simply don’t know what someone may add to a version of the software you might find elsewhere. Maybe some malicious actor added a line of code containing a virus, malware or spyware. If that is the case, you won’t even notice it and it might as well open a back door in your operating system.
Just so you know, a back door is an undetected access to a software or hardware created by a piece of software (Yes, could be those malicious lines of code). If you want to learn more about this threat head on to this article on wikipedia.
So, you can download the files from the link above or from these links: Installer and Checksum. The latter downloads the files and the first one points to their download page. If you choose the first link, download the files as shown in the picture below:

In case you are wondering, a portable version is one you don’t need to install to run. Step 2 also applies in case you opt not to install it.
Step 2: Verifying the downloaded file
This leads us to a step that you should always take if you want to max out your digital security. Verifying your download, that is. Wait…what happens to downloading from the source? You are right, we ARE downloading from the source BUT in case someone with ulterior motives happens to modify the soft we are downloading and it slips the official developers, they offer a code on their official website to help us validate our KeepassXC download. That code is like a digital signature they use to give their software a “seal of authenticity”.
We know this might feel too technical and it is not mandatory for the program to work, we just strongly recommend it and we think that if you read up to this line is because your password security actually concerns you. If you don’t want to go through this step, you may skip to step 3.
We point at two files in the picture above: One is the executable which will install KeepassXC on your computer and the other one is the signature we mentioned lines before. Go to your Downloads folder and right click the file named “KeePassXC-2.6.6-Win64.msi.DIGEST”
Select “Open with” from the drop down menu:

Then, click on more apps:
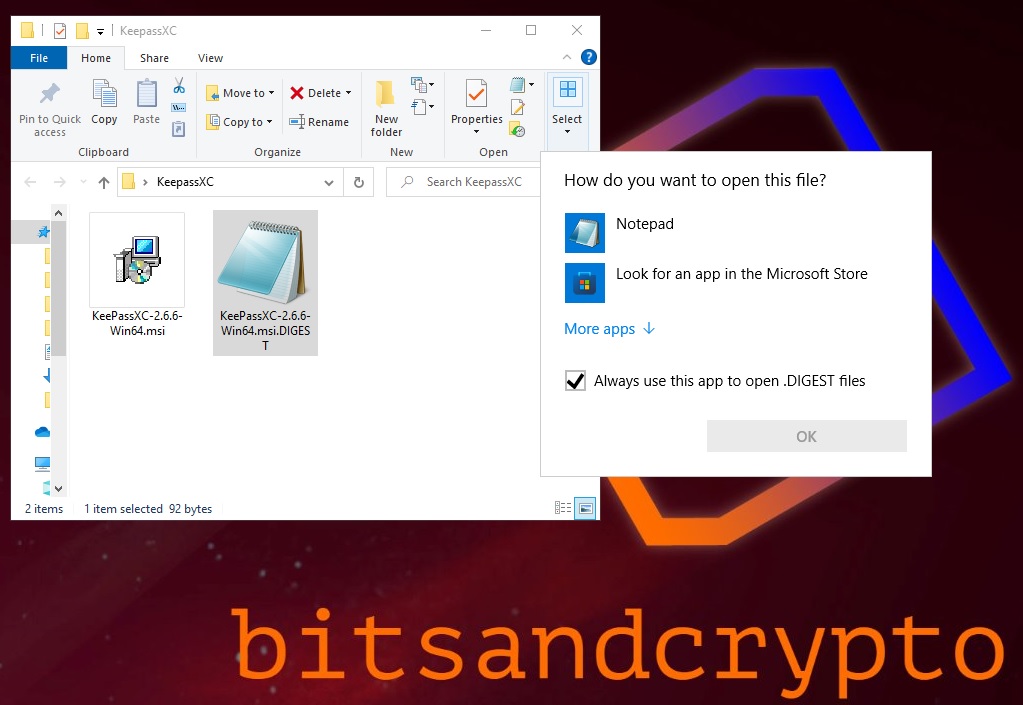
Now, scroll down and choose “Notepad”, then click OK.

Then you will see a single line of text displaying the signature as a bunch of nonsense characters all together (If you read our post about Bitcoin you will be familiar with the Signature format as Crypto wallets look in a very similar way). You will also find the file the signature points to. In our case it would be *KeePassXC-2.6.6-Win64.msi which is the file we just downloaded.
Use PowerShell to validate KeepassXC Installer:
A fast and convenient way to verify that the signature downloaded online matches the one embedded in the KeepassXC installer we just downloaded, is to verify it using Windows PowerShell.
To do this, click on the Start button and type “PowerShell”. Choose the one highlighted in the picture below and click on “Run as Admin”. A window will pop up and prompt you to open PowerShell or not. Click on “Yes”.

A blue screen with white characters will show up. We will just focus on our command. Type “Get-Filehash” (without the commas) then hit space and enter the full path to your KeepassXC download. We will make it easier for you: Copy and paste the text below on your PowerShell window. Make sure to replace [Username] with yours, and remove the brackets:
Get-Filehash C:\Users\[Username]\Downloads\KeePassXC-2.6.6-Win64.msi
The output should look something like this:

If the value under “Hash” column matches the one you opened in the .txt file then you are good to go. A good way is to copy and paste the value thrown by PowerShell and paste it below the one you opened with Notepad. You may read the first 4 and last 4 characters and if they match that’s okay as signatures are randomly created so if the first and last characters are the same then it means the signature matches. Or if you prefer, you can read and compare character by character or use a text compare tool like this cool online tool.
If you opt to use the online text compare tool, make sure to click on “Edit text” and select an option named “To lower case” as the Get-Filehash function on PowerShell tends to throw upper case results. To copy on PowerShell, just highlight the text and press CTRL + C at the same time on your keyboard. Right click and copy will not work on a PowerShell instance.
There are more in depth methods to further check the authenticity of a file but we will cover them in another post. For now, we can proceed to install from the KeepassXC file we downloaded.
Step 3: Installation
Lets install KeepassXC now. Go to the executable file you downloaded in Step 1 and double click on it. A welcome screen will show up. Click Next.
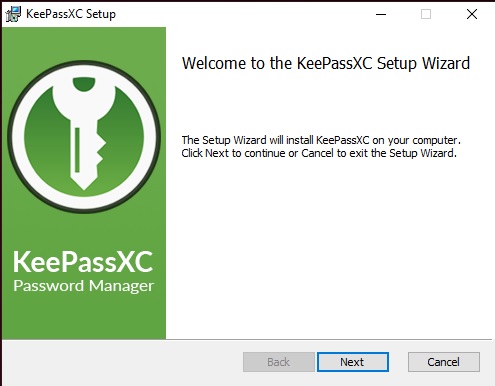
Then accept the terms and conditions on the following screen.

On the next screen you can opt to make KeepassXC start every time you login to Windows and Create a desktop Shortcut. We only chose the last option as we want a smooth startup process without too many thing starting at once. You can also change the installation path in this instance. We use the default settings.

After choosing over the installation details, the last screen will show up. Click on the Install button.
If a screen like the following one shows up, click on Yes.

And we are done! Click on Finish, and if you haven’t unchecked the “Launch KeepassXC” option then the program will start right away.

Now KeepassXC has launched and we are on its main screen. If a popup window asks for an update, you can choose to perform the update or you can do it later. We usually prefer having the latest version of any software we use, mainly if it is for security purposes as the latest versions tend to contain fixes for problems the developers noticed and some of those fixes mean more security for the end user.
Step 4: First run
So up to now we have:
- Downloaded the Software
- Checked its authenticity
- Installed it on our computer
Lest create a database where we will be storing our secure and strong passwords.
Click on Create New Database:

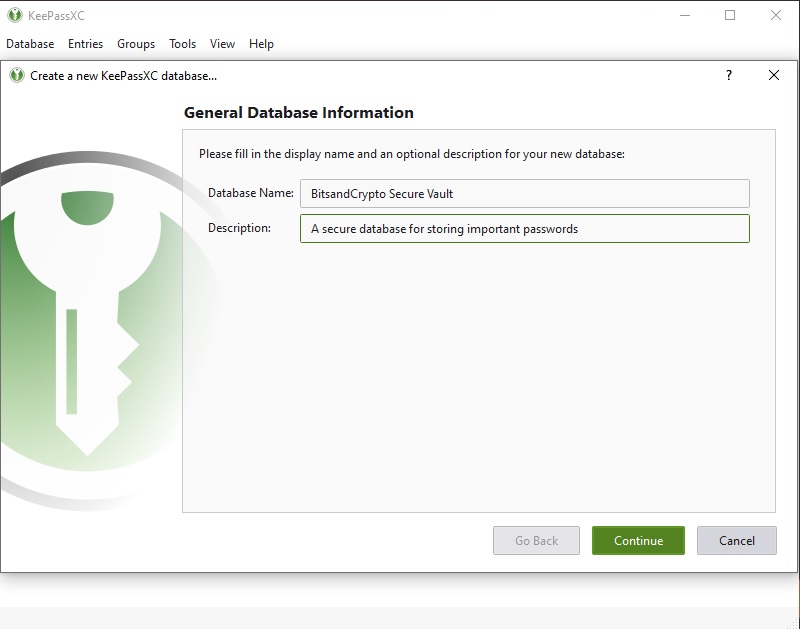
Now, give it a name and a description. The description is optional. Then click on continue.
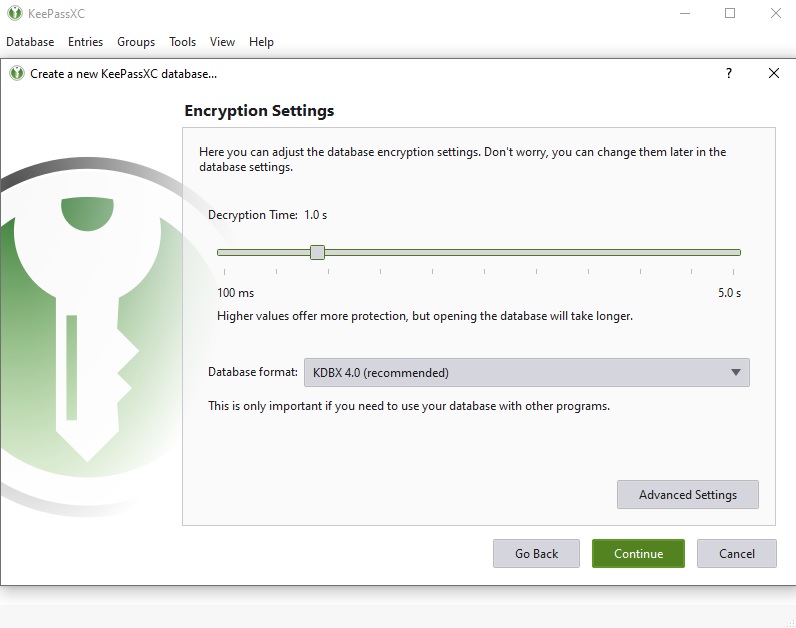
Leave the following settings as default, and hit continue.
Create a Master Password and if you want extra security, create a Key File you will store in a USB like we mentioned in this post. The master password has to be secure and known ONLY to you. Whoever has access to it will have access to all of your passwords so BE CAREFUL! You can create a random password or passphrase by clicking on the Dice Icon. If you create it like this, make sure to take note of your passphrase or password on a piece of paper so that you don’t get locked out of your Database. Store the piece of paper safely.

This is the dice image we mention up above, you can find it on the right of the form:

Key files, additional security:
A key file is like a offline Second Factor of Authentication. If someone gains access to your password but lacks your key file, then they won’t be able to access to your password manager’s database. We strongly recommend it!
To add a key file, click on “Additional Protection”. In the “Key File” menu click on “Generate”. If your thumb drive is already connected to your PC then save it there. If not, save it to your Desktop so you can find it easily and then paste it in your USB. The best practice would be to save it straight to your USB.

You have your key file now. Safeguard that USB in a place different from where you stored your written master password (Unless you have a good memory and created one you can remember for your master password). You will need it every time you open the Database.
When you are done creating the password and key file, you can move on and create the database. Choose a name for your database and create it on desktop (or the path of your choice). Safeguard that Database. You can place it together with the key file, although, a good practice would be a secondary USB so you have the Database and the key in separate places.
Congrats, You now have a working password manager! Say good bye to forgetting your password or using the same one for many logins and running unnecessary and totally avoidable risks.
Create your password:
The next and final step would be to create your first managed password. You can do this either by typing it yourself and saving it, or by creating a very strong password using the password creation tool (our favorite method).
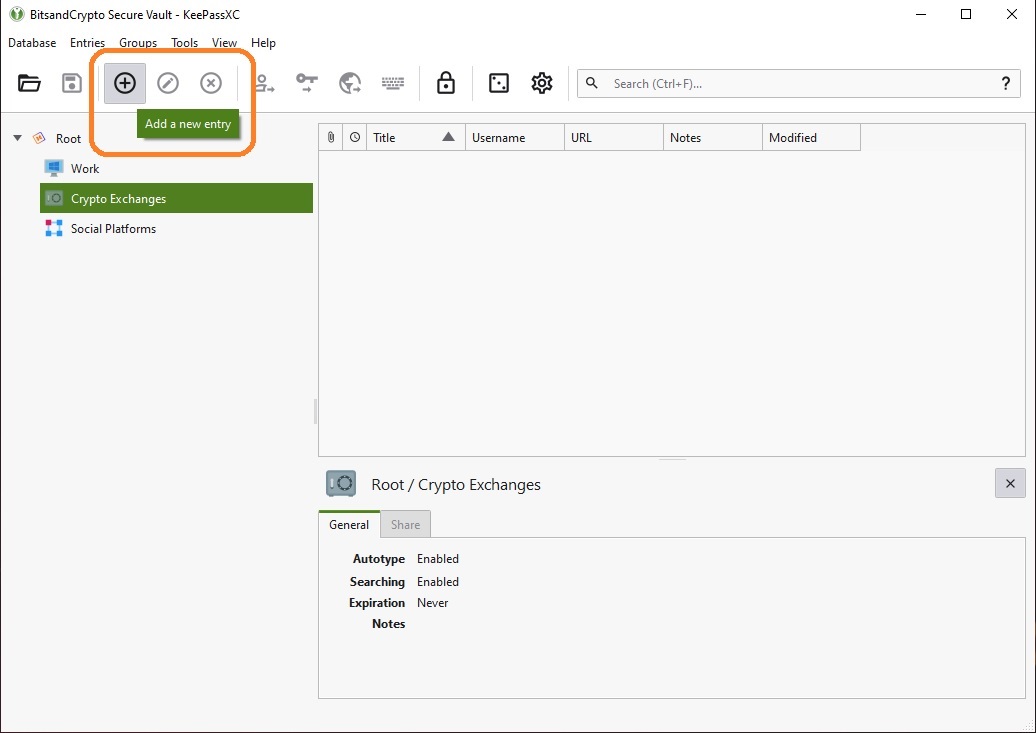
To create or add a password, click on the “+” button as shown in the image below. You will notice three groups have been created, that is done by right clicking on “Root” and then selecting “Create group”, it is not necessary but it can help you organize your passwords if you have many:
Then, fill in the text boxes with the requested information as shown in the picture (NOTICE: not an actual account):
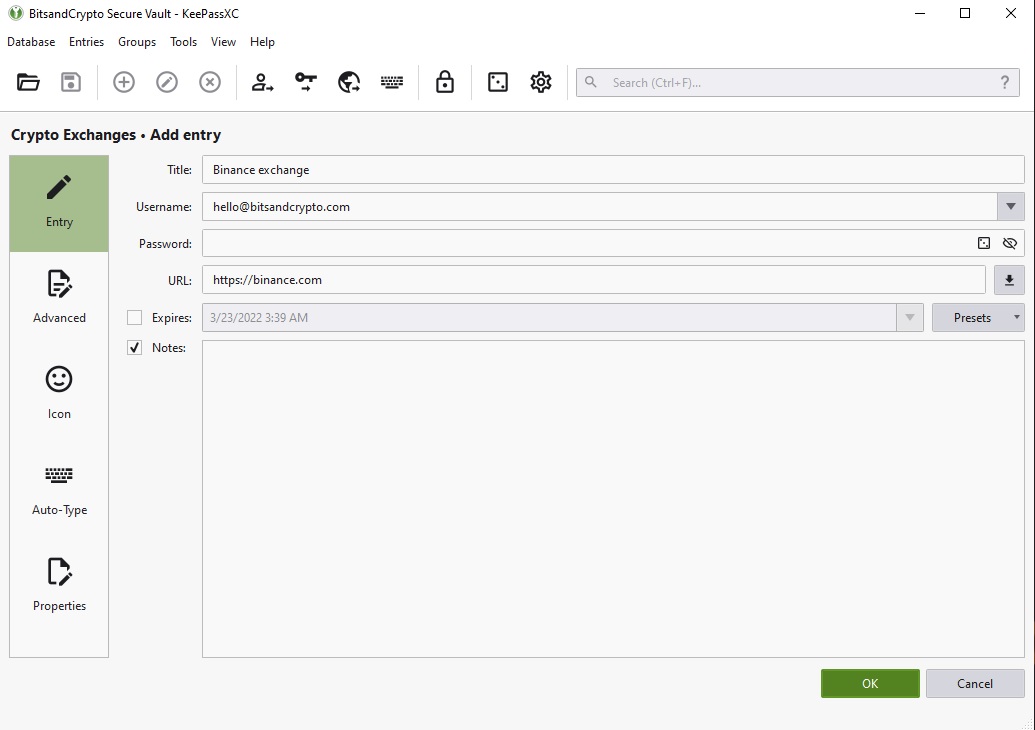
If you prefer to create a password instead of typing one of your own, then click on the dice like image on the right (in the password field):
Once you do that, you will have many options to customize your password:

In our example Above, we pick every single character type and chose the password to have a length of 64 characters to make it super strong and we choose a password instead of a passphrase.
When you finish creating your password, click on the “Apply Password” button on the bottom right and you will be done.
Now you can see your password has been created and shows up in the password field. Click “Okay”, and your password will show up in the selected category (If you don’t create any it will show up under “Root”)
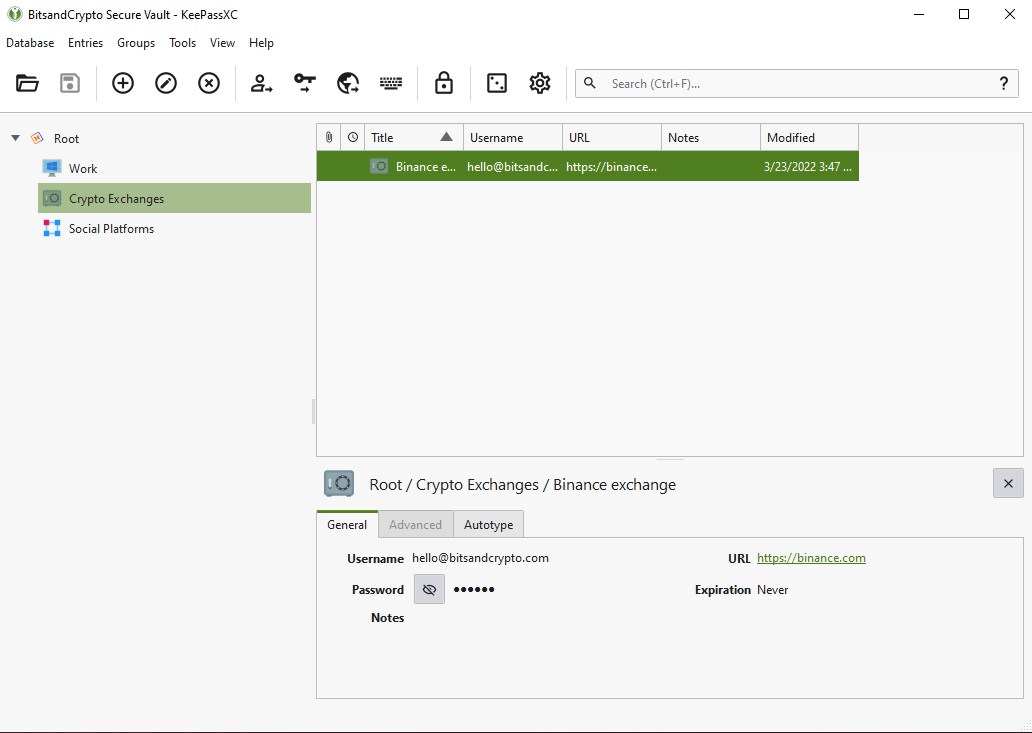
Use your new password:
In our post about password managers we mention that one of these tools perks is the fact that you don’t need to see your passwords to copy and paste them while logging in online in order to prevent anyone from snooping on your credentials if you are in a public place, say, a café for instance. To do that, you simply select the password and then press the little person icon to copy the username to paste it in the login form and then do the same with the password, by clicking on the key icon. You don’t even have to enter to the credentials details. Just blindly copy and paste them where requested as seen below:

You are free to play around creating passwords and credential groups as well as checking additional options. This tool has lots to offer, we cover the basics hoping you would feel interested in learning more. If this is the case, then stay tuned for more!
If you own a company and would like to implement this tool for your business, please contact us here or send us an email to hello@bitsandcrypto.com with the subject “Consulting” for more info and pricing.
Thanks for using our tutorial for setting up KeepassXC and stay safe!


